

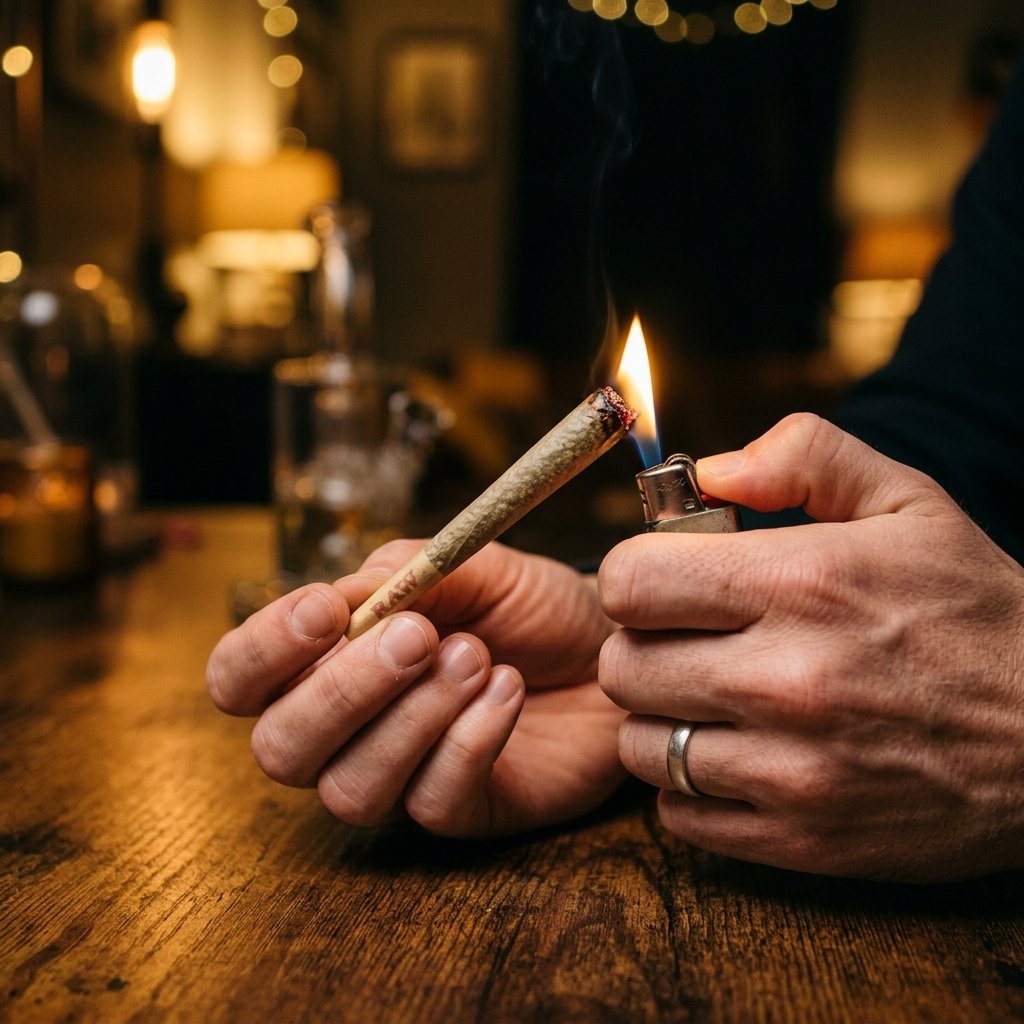
How to Light a Joint Properly: 5 Steps to Prevent Canoeing, Running & Uneven Burning
Knowing how to light a joint properly is one of the most overlooked skills in cannabis culture. A poorly lit joint leads to canoeing, uneven burning, and wasted product that frustrates even experienced smokers. The difference between a smooth, even burn and a lopsided mess comes down to your lighting technique, and understanding how to light a joint correctly is the first step toward a better experience.
This guide walks you through the correct way to light a joint every time. You will learn how to prevent canoeing, fix a running joint mid-session, and adapt your technique for cone joints, pre-rolls, mini joints, and windy conditions. Whether you use a regular lighter, Clipper, torch lighter, or matches, the fundamentals stay the same.
By the end of this article, you will understand exactly why joints canoe, how to stop it from happening, and what to do when things go wrong. These are practical, tested techniques that work with every joint style and lighter type.
Table of Contents
What Does It Mean to Light a Joint Properly?
Lighting a joint properly means applying heat evenly to the entire tip before inhaling. The goal is to create a uniform cherry that burns at the same rate across the full circumference of the joint. This prevents one side from burning faster than the other.
A proper light starts with patience. Most people who ask how to light a joint do not realise that rushing the process is the number one mistake. Taking hard pulls while the flame touches the paper pulls heat unevenly and creates an immediate imbalance in the burn pattern.
The correct technique involves holding the flame just below the tip and rotating the joint slowly. Let the heat toast the end until it glows evenly. Only then should you take your first gentle draw to establish the cherry.
How to Light a Joint Evenly: Step-by-Step
Learning how to light a joint so it burns evenly requires a simple but specific process. Follow these five steps for a perfect light every time:
- Hold the joint at a slight downward angle. This positions the tip for even heat distribution and prevents the flame from running up the paper.
- Bring the flame to the very tip. Keep the lighter flame about half an inch below the end of the joint. Do not touch the flame directly to the paper.
- Rotate the joint slowly. Turn it between your fingers while applying heat. This ensures every part of the tip receives equal exposure to the flame.
- Wait for the tip to glow. You want to see a complete, even orange glow across the entire end before you inhale.
- Take a slow, gentle first puff. A soft draw pulls the cherry inward evenly. Hard pulls create suction that favours one side.
This method works whether you are lighting a hand-rolled joint, a pre-roll, or a cone. The key principle is always the same: even heat distribution before your first inhale. Once you master how to light a joint using this rotation technique, uneven burns become rare.
Why the First Puff Matters
Your first puff sets the burn pattern for the entire session. A gentle, slow draw pulls the flame evenly into the joint. A hard pull concentrates the heat on one side and starts canoeing immediately.
Think of it like starting a campfire. You do not blow hard on a single ember. You let the heat spread gradually until the entire surface catches. The same principle applies when you light a joint properly.
How to Prevent a Joint From Canoeing and Running
Canoeing happens when one side of a joint burns faster than the other, creating a canoe-shaped hollow. Running is similar but involves the burn travelling down a single strip of paper. Both problems ruin the smoking experience and are directly linked to how you light a joint in the first place.
Causes of Canoeing
Uneven grinding is the most common cause. Large chunks of cannabis burn slower than finely ground material. When you pack a joint with inconsistent particle sizes, the denser areas resist burning while the finer areas burn quickly.
Poor packing density also contributes. A joint that is too loose burns too fast. A joint packed too tight restricts airflow and burns unevenly. Aim for a firm but not rock-hard consistency throughout.
How to Stop a Joint From Running
If your joint starts running, act quickly. Lick your finger and apply a small amount of moisture to the paper on the fast-burning side. This slows down the burn on that side and allows the slower side to catch up.
Another method is to turn the running side upward. Heat rises, so positioning the faster-burning side on top slows its progress while the bottom catches up naturally.
How to Save a Joint After It Starts Canoeing
When a joint canoes badly, you can use your lighter to carefully burn away the excess paper on the slow side. Hold the flame to the unburned paper for a second or two until it catches. Then rotate and even out the cherry.
For severe canoeing, consider relighting the joint entirely. Tap off the ash, use a flat surface to gently press the cherry even, and relight using the rotation method described above. Even experienced cannabis users need to do this occasionally, so there is no shame in a relight. For more practical how-to guides on solving common problems, check out our other lifestyle articles.
How to Light Different Types of Joints
Not every joint is the same shape, and each style requires a slightly different approach. Knowing how to light a joint that matches the specific shape you are smoking makes a real difference in burn quality.
How to Light a Cone Joint
Cone joints have a wider tip that tapers to a narrow filter. The larger surface area at the tip means you need more time and rotation to light evenly. Start at the very centre of the tip, then work the flame outward in a circular motion.
Take your first draw even more gently than with a standard joint. The wide tip of a cone means more material needs to catch evenly.
How to Light a Pre-Rolled Joint
Pre-rolls from dispensaries are machine-packed and sometimes inconsistently dense. Before lighting, gently roll the pre-roll between your fingers to loosen any overly compressed spots. Then use the standard rotation technique to light a joint that burns smoothly from tip to filter.
Some pre-rolls have a twisted paper tip. Burn this off first before attempting to light the cannabis itself. Hold the flame to the twisted end until it falls away, then proceed with your normal lighting method.
How to Light a Fat Joint
Fat joints require extra patience during lighting. The larger diameter means more surface area needs even heat. Spend additional time rotating and toasting before your first puff. Consider using a wider flame source like a torch lighter for more consistent coverage.
How to Light a Mini Joint
Mini joints light quickly due to their small diameter. Use a controlled flame and be careful not to over-char the tip. A single rotation with a standard lighter is usually enough. Take very gentle draws since the smaller diameter concentrates the airflow.
How to Light a Cross Joint
Cross joints require lighting three tips simultaneously. You need a friend to help. Each person lights one end while the third person lights the main tip. All three tips must catch at roughly the same time for even burning across the cross structure.
Lighter Types and Joint Lighting
The tool you use to light a joint affects the quality of your burn. Each lighter type has advantages and disadvantages worth understanding before your next session.
Regular Lighter (Bic-Style)
The standard disposable lighter is the most common choice. It produces a soft yellow flame that is easy to control. The moderate heat output is ideal for the rotation technique. Bic-style lighters are inexpensive, widely available, and reliable.
Clipper Lighter
Clipper lighters are popular among joint smokers because they are refillable and produce a consistent flame. The removable flint system doubles as a packing tool for joints, which makes them practical for on-the-go rolling.
Torch Lighter
Torch lighters produce a focused blue flame with higher heat output. They are excellent for windy conditions because the flame resists wind better than soft flames. However, the intense heat can char the tip if you hold it too close. Keep extra distance between a torch flame and your joint.
Matches
Matches work well for lighting joints, but wait two seconds after striking to let the sulphur tip burn off. The initial flare can leave a chemical taste on the paper. Once the match flame stabilises, use the same rotation technique as with a lighter.
How to Light a Joint Without a Lighter
In a pinch, you can use a stovetop burner, a candle, or even the heating element of a toaster. Position the joint tip near the heat source and rotate slowly. Avoid methods that produce toxic fumes, such as burning plastic or using industrial heat sources.
How to Light a Joint in Windy Conditions
Wind is the biggest enemy of a properly lit joint. Moving air disrupts the flame and causes one side to burn faster. Knowing how to light a joint outdoors requires a few extra precautions. Shield the joint with your cupped hands while lighting and position your body as a windbreak.
A torch lighter is your best option outdoors. Its pressurised flame cuts through wind better than a standard lighter. If you only have a regular lighter, cup both hands tightly around the tip and lighter, creating an enclosed pocket of still air.
Common Joint-Lighting Mistakes
Most uneven burns come from a handful of repeated errors. Anyone learning how to light a joint should avoid these common mistakes:
- Inhaling while lighting. Drawing air through the joint while the flame is active pulls heat unevenly. Toast the tip first, then puff.
- Holding the lighter too close. Direct contact with a flame chars the paper and creates hot spots that burn through quickly.
- Not rotating the joint. Holding the joint still means one side gets all the heat. Always rotate for even coverage.
- Using a wet or damp joint. Moisture in the paper or cannabis causes uneven drying and burning. Make sure your joint is completely dry before lighting.
- Taking hard initial puffs. Aggressive draws pull the cherry to one side. Start with gentle sips of air.
- Ignoring the grind quality. Uneven grinding leads to uneven burning. Use a quality grinder and break up any remaining chunks by hand.
What to Do If a Joint Burns Unevenly
Even with perfect technique, joints sometimes burn unevenly. Environmental factors, humidity, and the cannabis strain itself can all affect the burn. Knowing how to light a joint is only half the equation — you also need to know how to fix problems mid-session.
For minor unevenness, simply rotate the joint so the fast-burning side faces upward. Gravity and heat physics will naturally slow the top and accelerate the bottom.
For moderate canoeing, apply saliva to the fast-burning side to slow it down. This buys time for the slow side to catch up. Combine this with gentle puffs to draw heat toward the lagging area.
For severe canoeing, carefully use your lighter to burn away excess paper on the slow side. Then tap off loose ash and relight the cherry evenly using the rotation method.
Joint Lighting FAQs
Why does my joint keep canoeing even when I light it properly?
Canoeing despite proper lighting usually indicates a grinding or packing issue. Uneven grind consistency creates dense spots that resist burning. Try using a finer, more uniform grind and packing the joint with consistent density from filter to tip. Humidity in the cannabis can also cause one side to burn slower than the other.
Is a torch lighter better than a regular lighter for joints?
Torch lighters work best in windy outdoor conditions because their pressurised blue flame resists wind. For indoor or calm environments, a regular Bic-style lighter gives you more control over heat intensity. Torch lighters can char the tip if held too close, so they require slightly more distance and skill to use effectively.
How do I light a joint without it running down one side?
Running happens when the flame catches one strip of paper before the rest of the tip. To prevent this, always rotate the joint during lighting and avoid inhaling while the flame is active. Toast the entire tip evenly first, wait for a uniform glow, then take a gentle first puff to set an even burn pattern.
Can I relight a joint that has gone out without ruining it?
Yes. Tap off any loose ash from the end, then relight using the same rotation method you would use for a fresh joint. The taste may be slightly different because previously burned material near the cherry produces a stronger flavour. Burn off any blackened paper before relighting for a cleaner experience.
What is the best way to light a joint for the first time?
Hold the joint at a slight angle, bring the flame just below the tip without touching it, and rotate slowly for three to four seconds. Wait for the entire tip to glow orange before taking a gentle first puff. This rotation method is the most reliable way to light a joint evenly on your first attempt.
Conclusion
Knowing how to light a joint properly transforms your smoking experience from frustrating to enjoyable. The technique is simple: hold the flame below the tip, rotate slowly, wait for an even glow, and take a gentle first puff. This approach works for every joint type, from cones and pre-rolls to fat joints and cross joints.
Canoeing, running, and uneven burning are almost always preventable with proper lighting, consistent grinding, and even packing. When problems do occur, the fixes are straightforward. Moisture, rotation, and relighting can save nearly any session.
Choose the right lighter for your situation, avoid the common mistakes listed above, and practice the rotation technique until it becomes second nature. Once you master how to light a joint using these fundamentals, every session will burn smoothly and evenly from start to finish.
